v5 (LATEST)
Devnet
Testnet
Mainnet
Install cored
This document provides the instruction on how to install the release binaries of the cored.
Choose preferred way to install cored:
Install prebuilt cored
Note: this option supports linux OS only. Also, it should be used in case you interact with the chain with the CLI only.
-
Verify that network variables are set up correctly.
-
Create a proper folder structure for
cored.mkdir -p $COREUM_HOME/bin -
Install the required util:
curl. -
Download
coredand put it in the required folder.curl -LO https://github.com/CoreumFoundation/coreum/releases/download/$COREUM_VERSION/$COREUM_BINARY_NAME mv $COREUM_BINARY_NAME $COREUM_HOME/bin/cored -
- If you are getting 404 error at this step, run:
echo https://github.com/CoreumFoundation/coreum/releases/download/$COREUM_VERSION/$COREUM_BINARY_NAME
- If you are getting 404 error at this step, run:
-
Add
coredto PATH and make it executable.export PATH=$PATH:$COREUM_HOME/bin chmod +x $COREUM_HOME/bin/*Attention! Set this variable globally so it will be automatically set after starting a new terminal session.
-
Test
cored.cored version
That's it, you have cored installed! You can return to previous Readme.
Build from sources
The Build and Play doc describes the
process of building and installation the cored binary from sources.
That's it, you have cored installed! You can return to previous Readme.
install prebuild macOS
Exporting Network Variables for macOS Users
*1. Open Terminal. *2. Export the network variable using the commands provided below.
Configuring Your Development Environment with .bash_profile
-
Open your
.bash_profilein Terminal:nano ~/.bash_profile -
Add the following lines to set environment variables:
export PATH="/Users/yourusername/Documents/crust/bin:$PATH" export CORED_NODE="https://full-node.testnet-1.coreum.dev:26657" export COREUM_DENOM="utestcore" export COREUM_VERSION="v2.0.2" export COREUM_CHAIN_ID_ARGS="--chain-id=\$COREUM_CHAIN_ID" export COREUM_NODE_ARGS="--node=\$COREUM_NODE" export COREUM_CHAIN_ID="coreum-testnet-1" export COREUM_HOME=\$HOME/.core/"\$COREUM_CHAIN_ID" export COREUM_BINARY_NAME=\$(arch | sed s/aarch64/cored-linux-arm64/ | sed s/x86_64/cored-linux-amd64/) -
Save your changes and exit nano:
- Press
Ctrl + Oto write the changes. - Press
Enterto confirm the file name. - Press
Ctrl + Xto exit nano.
- Press
-
Apply the changes to your current terminal session:
source ~/.bash_profile
install prebuild windows
This document outlines the steps for setting up a prebuilt environment on Windows, including finding PowerShell, installing Microsoft WSL, configuring WSL, and handling common errors.
Find PowerShell
Press Windows + X and select "Windows PowerShell (Admin)" from the menu.
Install Microsoft WSL
Follow the instructions provided by Microsoft to install Windows Subsystem for Linux (WSL): Install WSL
Brief Tutorial With WSL
Start WSL
To start your default WSL Linux distribution, in the PowerShell window, type:
To start a specific distribution (e.g., Ubuntu), use:
wsl -d Ubuntu
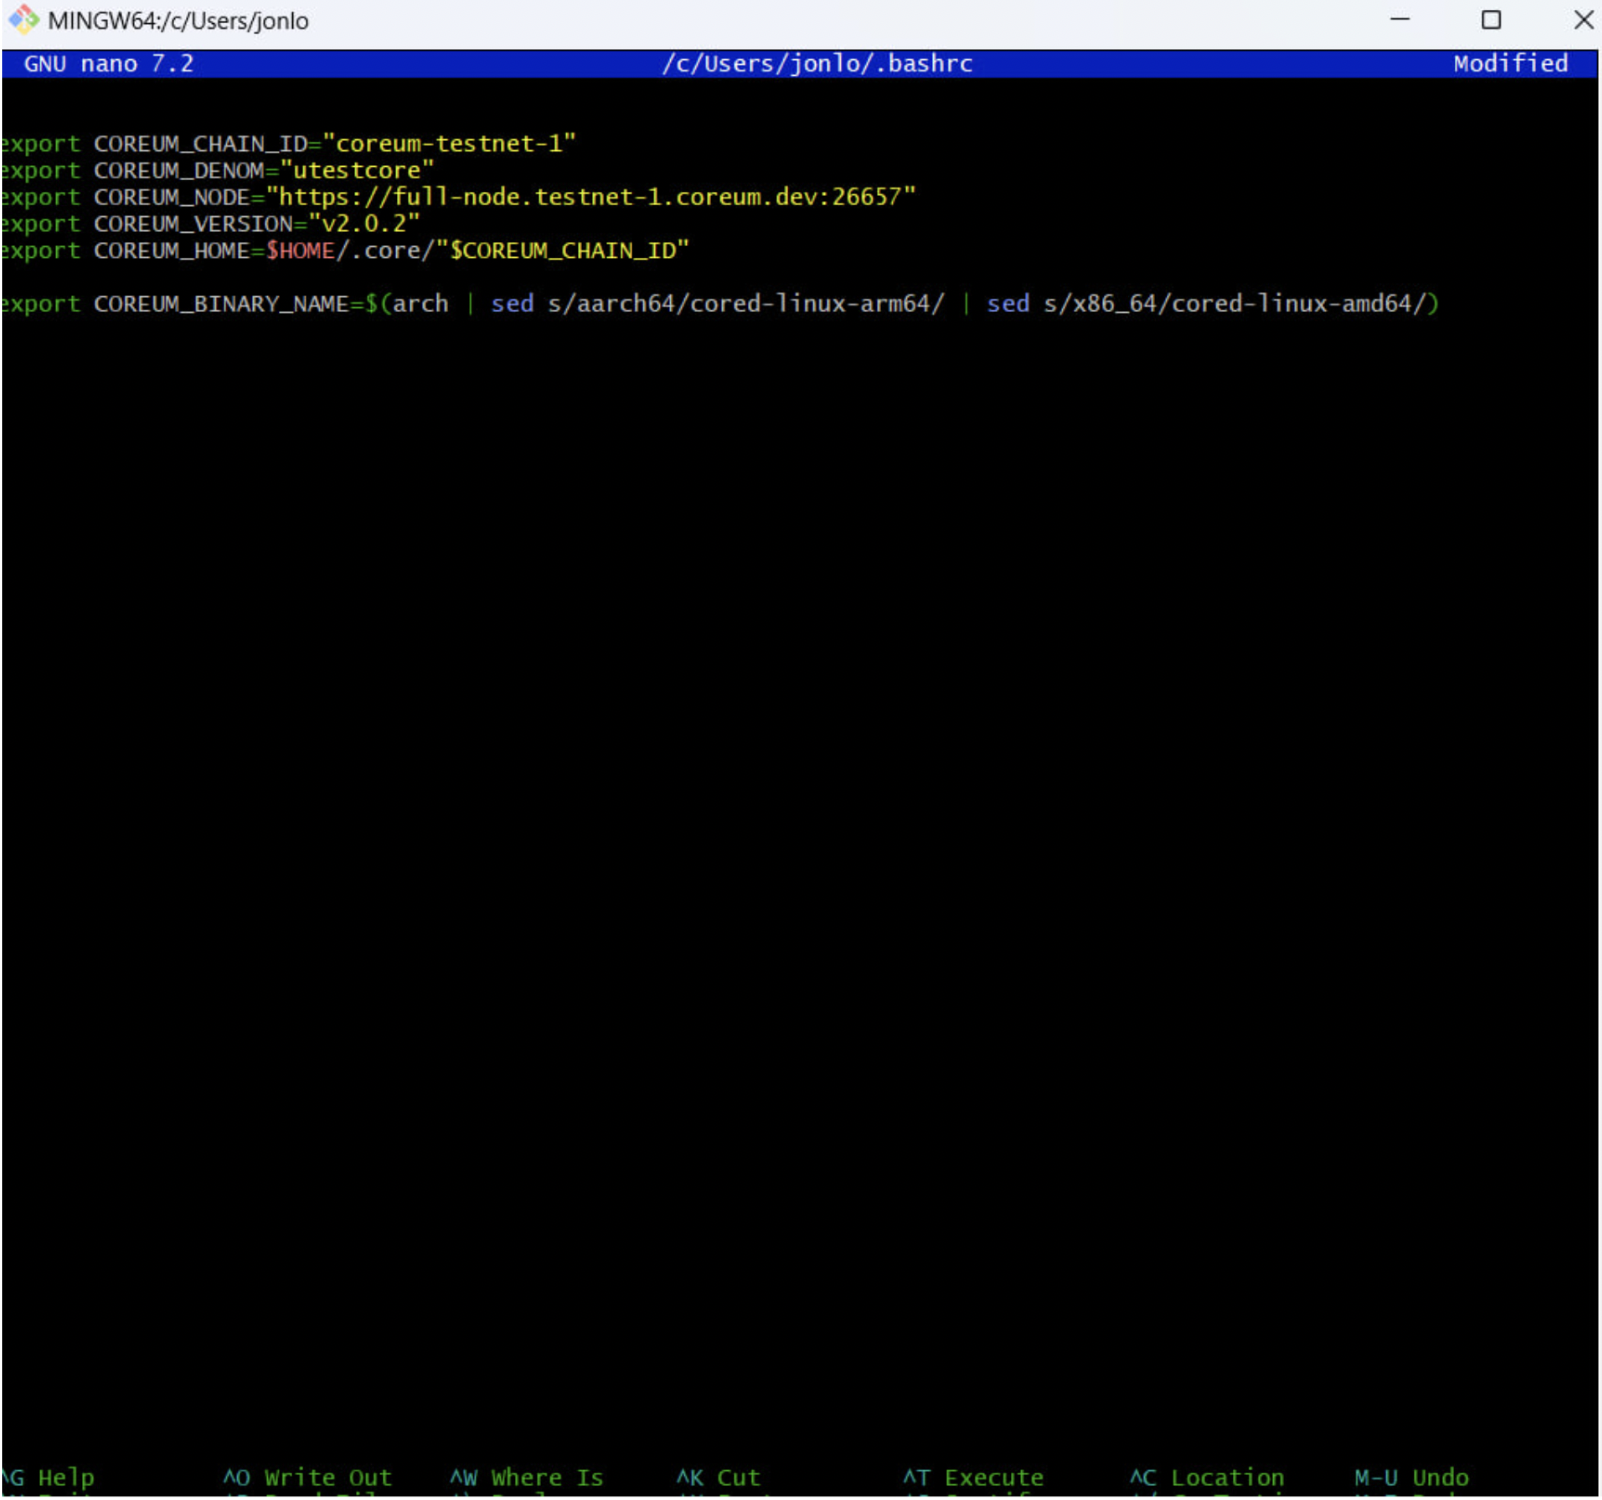
- Set Global Variables in Terminal
nano ~/.bashrc - Add your global variables at the end of the file. For example, to set COREUM_HOME, you might add:
export COREUM_HOME="/path/to/coreum" - Check Your Variables
To ensure your variables are correctly set, execute:
source ~/.bashrc
echo $
Set Up cored Using Docker
Steps to Install cored
1. Install Docker
Ensure Docker is installed on your machine. You can download Docker from the Docker official website
2. Create the Dockerfile
Create a file named Dockerfile and add the following content:
# Use Alpine Linux for the final image
FROM alpine:latest as base

# Install necessary packages
RUN apk add --no-cache ca-certificates curl bash

# Set environment variables
ENV COREUM_CHAIN_ID="coreum-testnet-1"
ENV COREUM_DENOM="utestcore"
ENV CORED_NODE="https://full-node.testnet-1.coreum.dev:26657"
ENV COREUM_VERSION="v5.0.0" # use the latest version

ENV COREUM_CHAIN_ID_ARGS="--chain-id=$COREUM_CHAIN_ID"
ENV COREUM_NODE_ARGS="--node=$COREUM_NODE"

ENV COREUM_HOME="/root/.core/$COREUM_CHAIN_ID"
ENV COREUM_BINARY_NAME=cored-linux-amd64

# Create directories
RUN mkdir -p $COREUM_HOME/bin

# Download the cored binary
RUN curl -Lo $COREUM_HOME/bin/cored https://github.com/CoreumFoundation/coreum/releases/download/$COREUM_VERSION/$COREUM_BINARY_NAME

# Make the binary executable
RUN chmod +x $COREUM_HOME/bin/cored

# Add the binary to PATH
ENV PATH=$PATH:$COREUM_HOME/bin

# Expose the necessary ports (adjust these if needed based on the application requirements)
EXPOSE 26656 26657 9090 9091 1317 6060 26660

# Set a command or script that keeps the container running since the ENTRYPOINT is not starting the node
CMD ["tail", "-f", "/dev/null"]
3. Build the Docker Image
Build the Docker image using the Dockerfile. Open a terminal, navigate to the directory containing the Dockerfile, and run:
docker build -t coreum-cored .
4. Run the docker Container
Run the Docker container using the built image:
docker run -d --name coreum-cored-container -p 26656:26656 -p 26657:26657 -p 9090:9090 -p 9091:9091 -p 1317:1317 -p 6060:6060 -p 26660:26660 coreum-cored
This command runs the container in detached mode (-d), names it coreum-cored-container, and maps the necessary ports.
5. Verify the Container is Running
Check if the container is running:
docker ps
You should see coreum-cored-container listed.
6. Verify the Container is Running
To access the running container and verify that the cored binary is correctly set up, use:
docker exec -it coreum-cored-container /bin/bash
7. Test Cored
cored version