IBC Transfer to Osmosis Using Keplr Wallet
This guide walks you through the steps involved in sending an IBC transfer to osmosis using the Keplr wallet.
1. Open Keplr Wallet
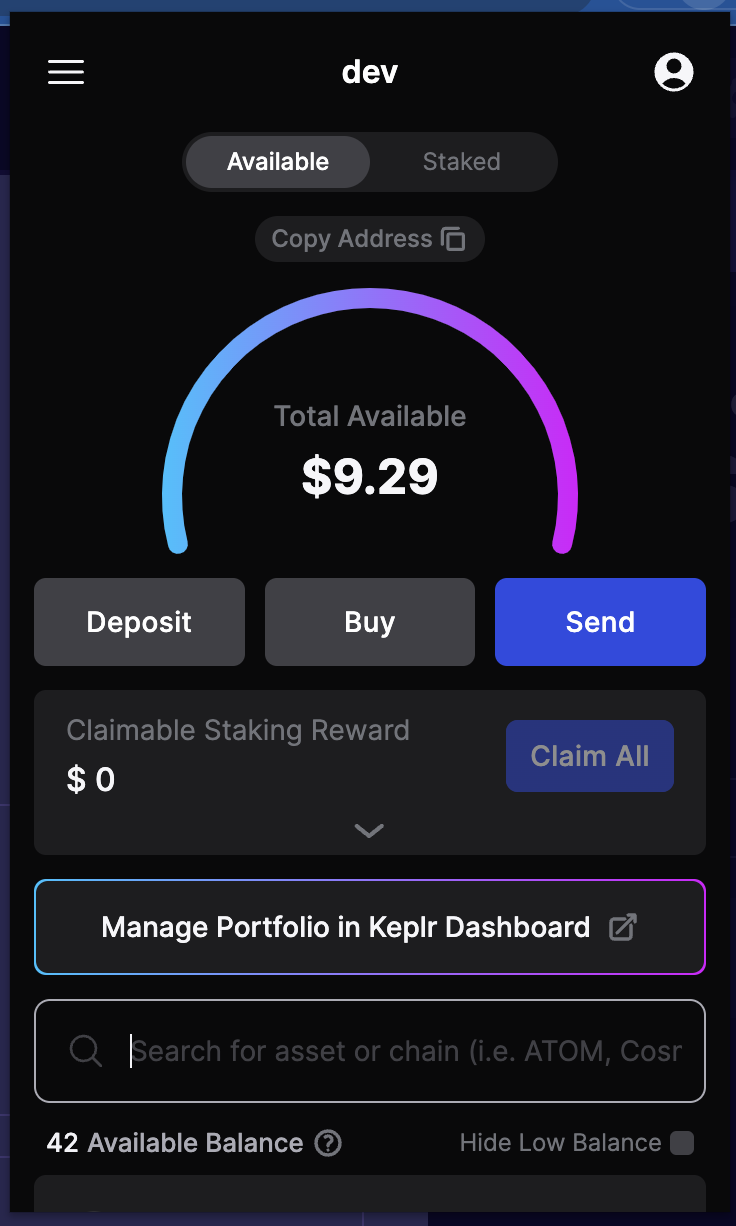
Start by opening your Keplr wallet. If you don't have it installed, you can download it from the browser extension store.
2. Navigate to Advanced IBC Transaction
In your Keplr wallet, navigate to the section where you can initiate an advanced IBC transaction.
Note: If you do not have "Developer Mode" enabled on your Keplr Wallet, you will not see this
option. To enable developer mode, go to Settings -> Advanced, and enabled "Developer Mode".
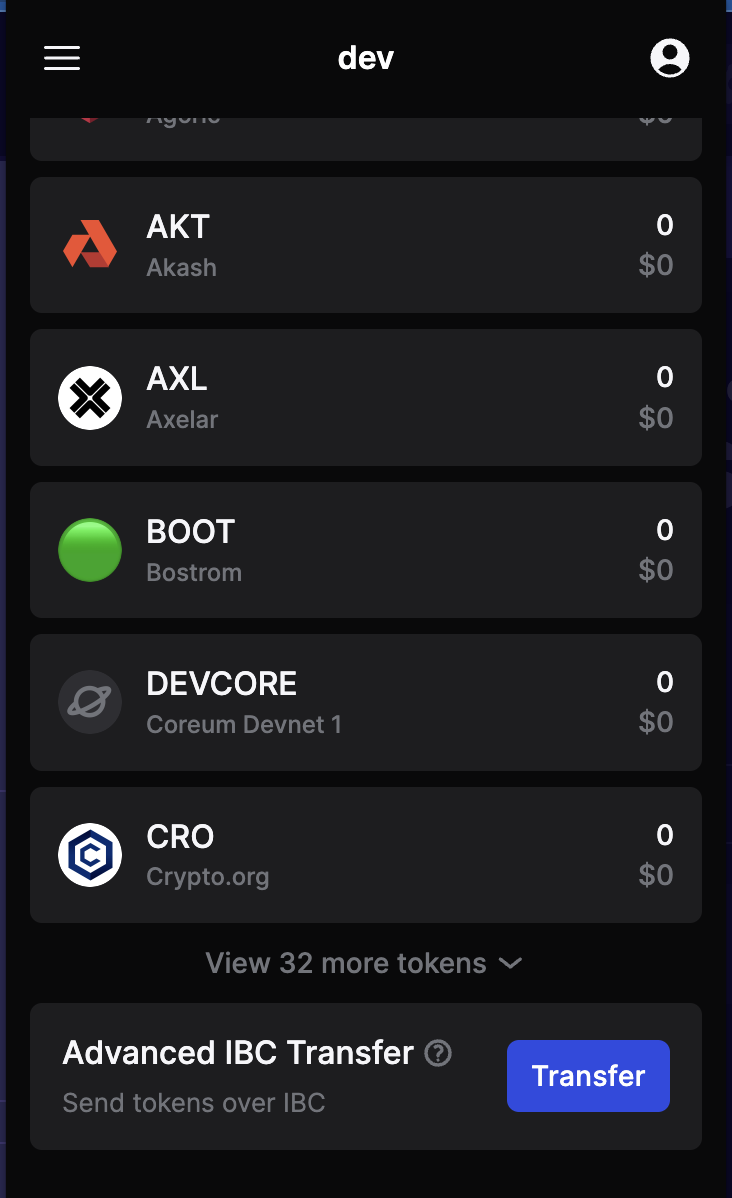
3. Select Asset
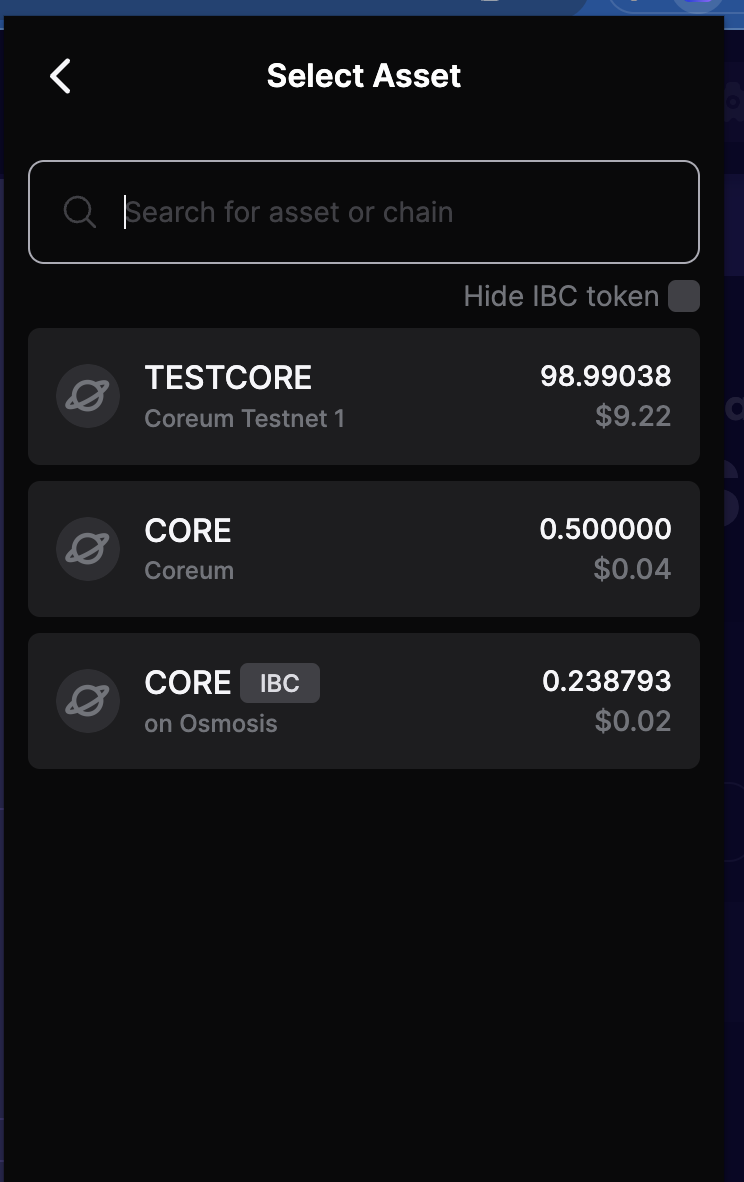
Choose the asset/token you want to transfer. Ensure you have sufficient balance for the transfer.
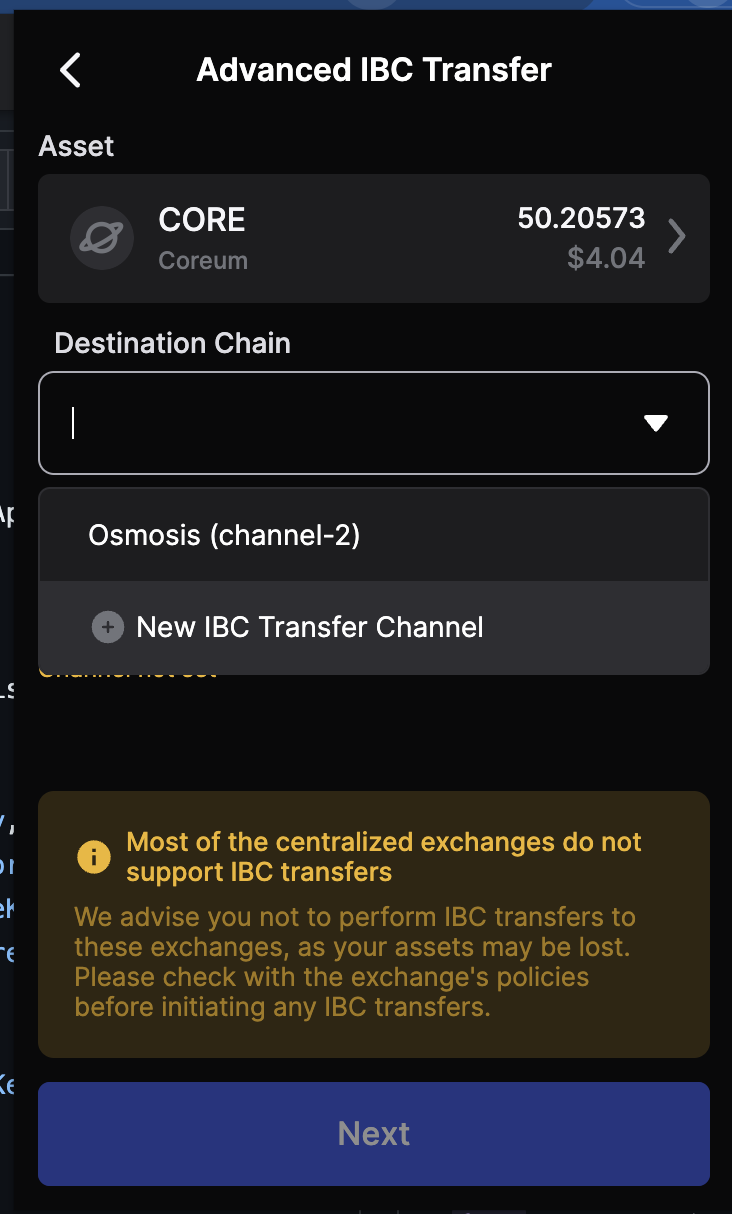
4. Choose Destination Chain
Adding IBC Transfer Channel in Keplr
You must first add the IBC Transfer Channel to Keplr. When you click on destination chain, you will see "Add New IBC Tranfer Channel", with a "+" icon. Choose the relevant destination chain.
Next, you can add an IBC Channel, and the corresponding Source Channel ID
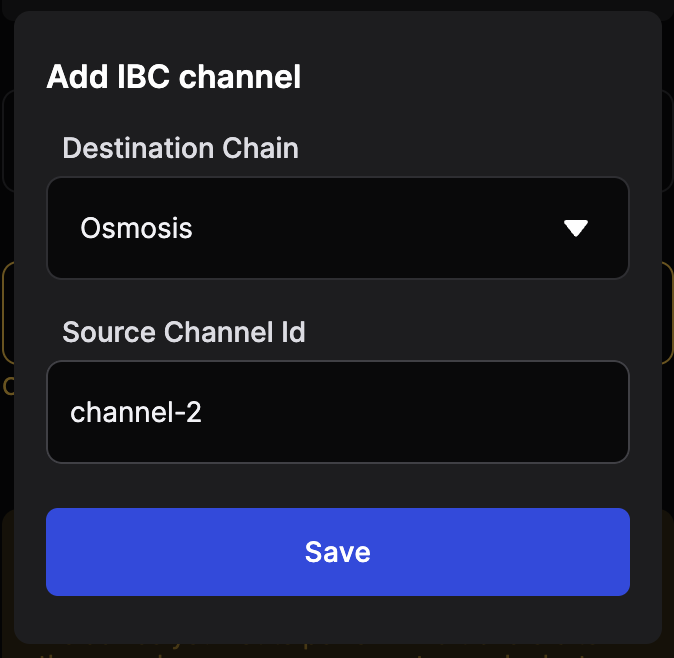
You can find the relevant Configurations for Coreum here: Coreum IBC Channels
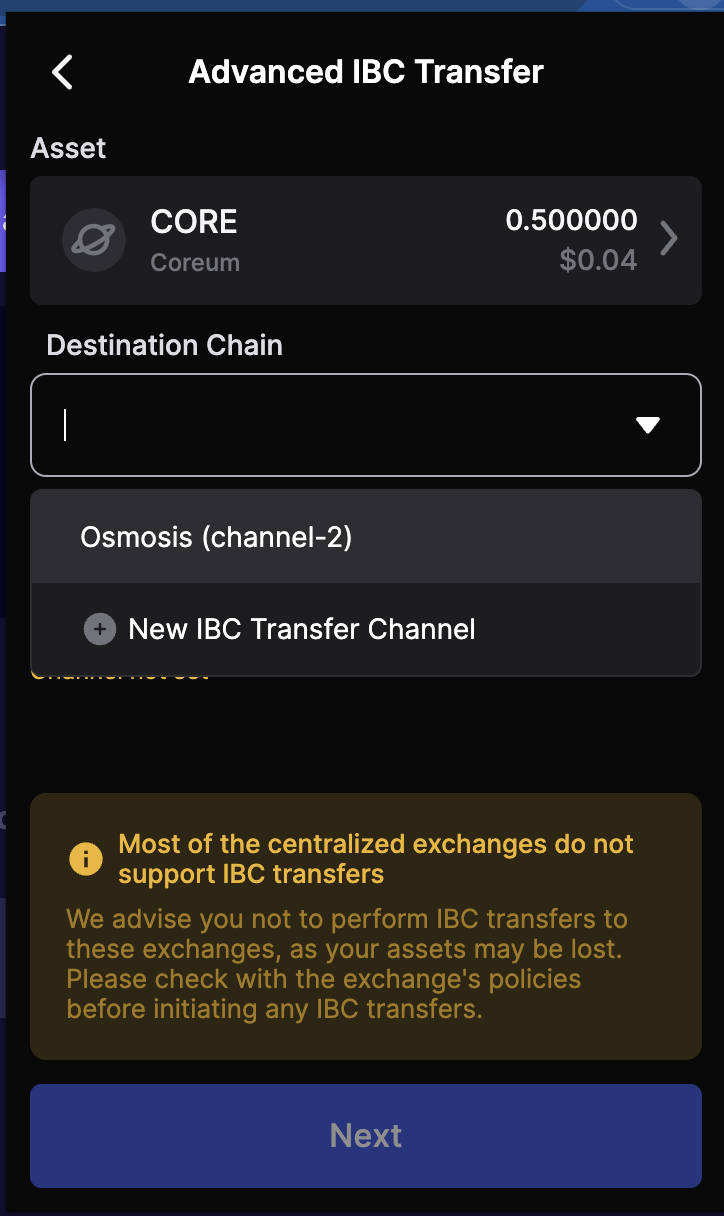
Select the blockchain where you want to send the asset. This is the receiving chain of the IBC transfer.
Note: This will be blank if the channel-id has not been registered in the IBC Chain Registry, and
correctly opened by the relayer.
5. Enter Wallet Address
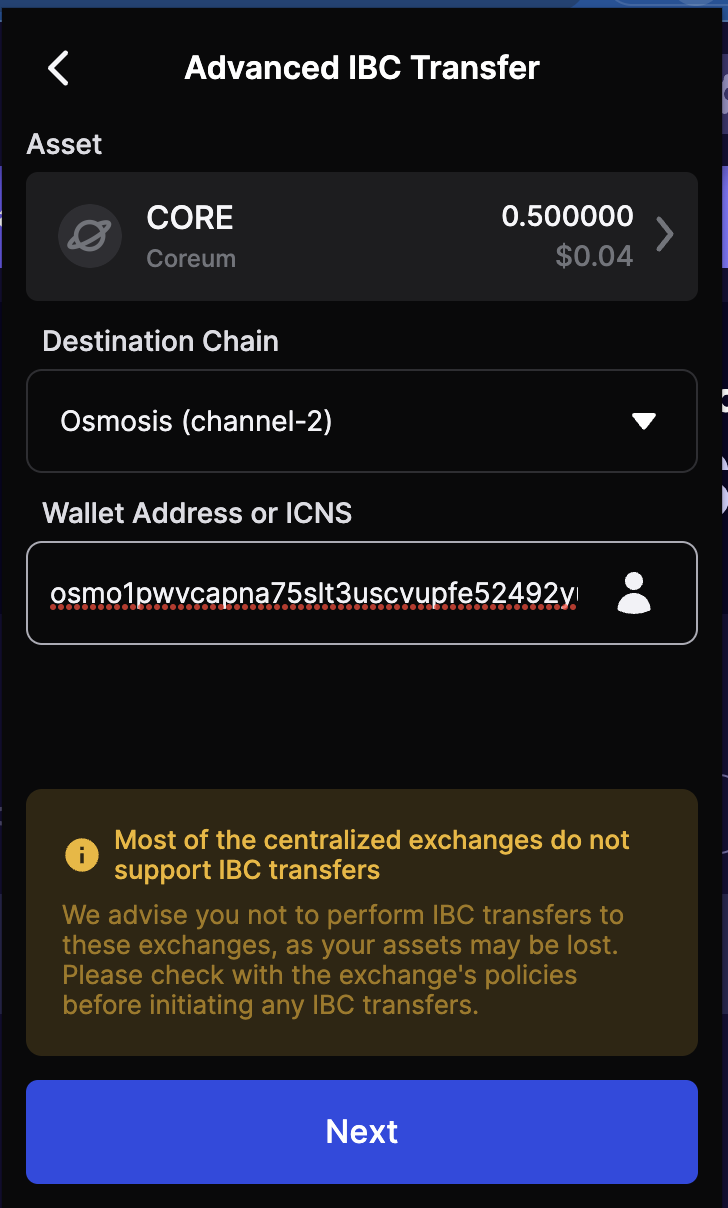
Provide the address of the recipient's wallet on the destination chain.
6. Enter Amount
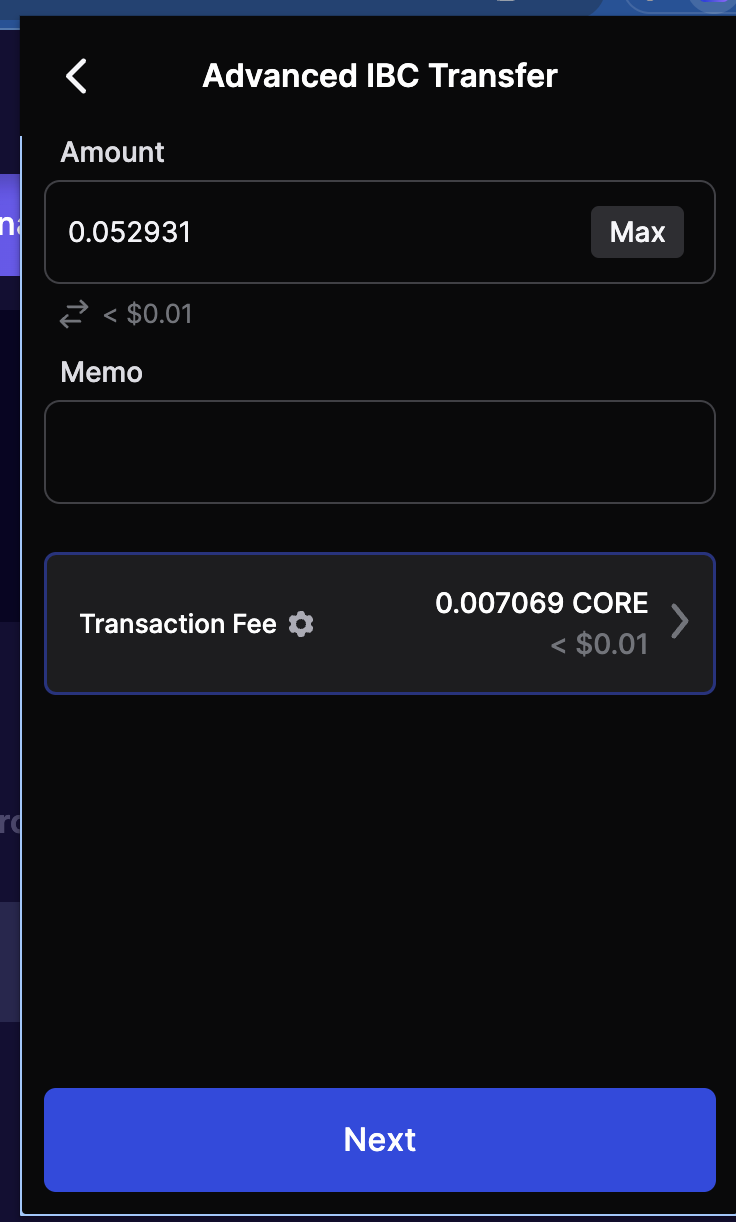
Specify the amount of the asset you wish to transfer. Ensure you account for any transaction fees.
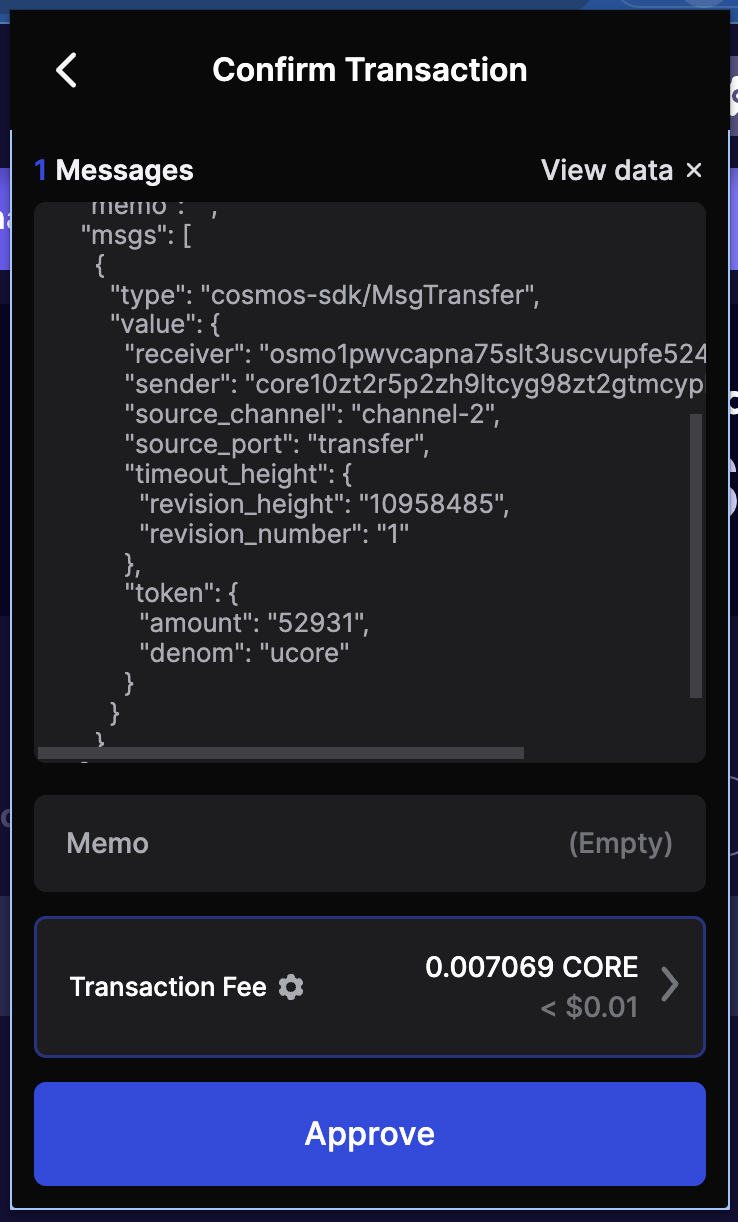
7. Review Transaction

Review all the details of the transfer. Ensure everything looks correct before proceeding.
7a. Confirm Transaction Details
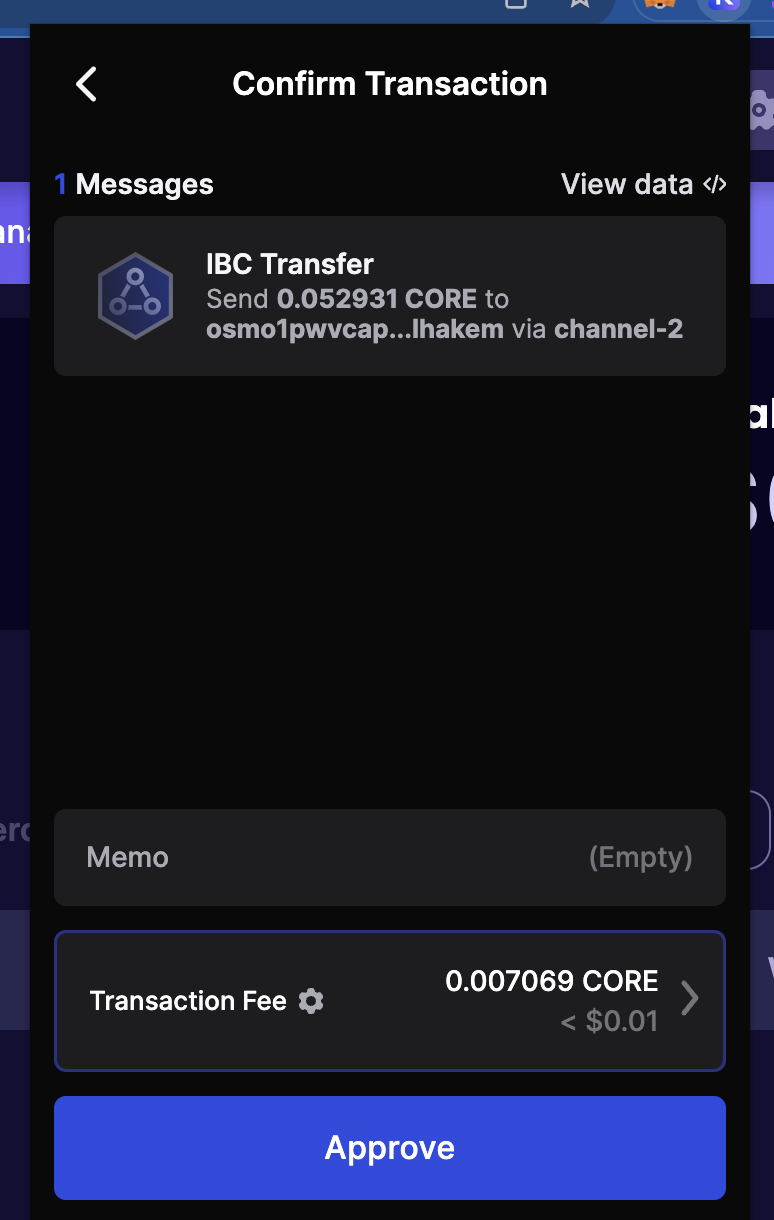
Keplr might ask you to confirm the transaction details once more. Double-check and proceed.
7b. Approve Transaction
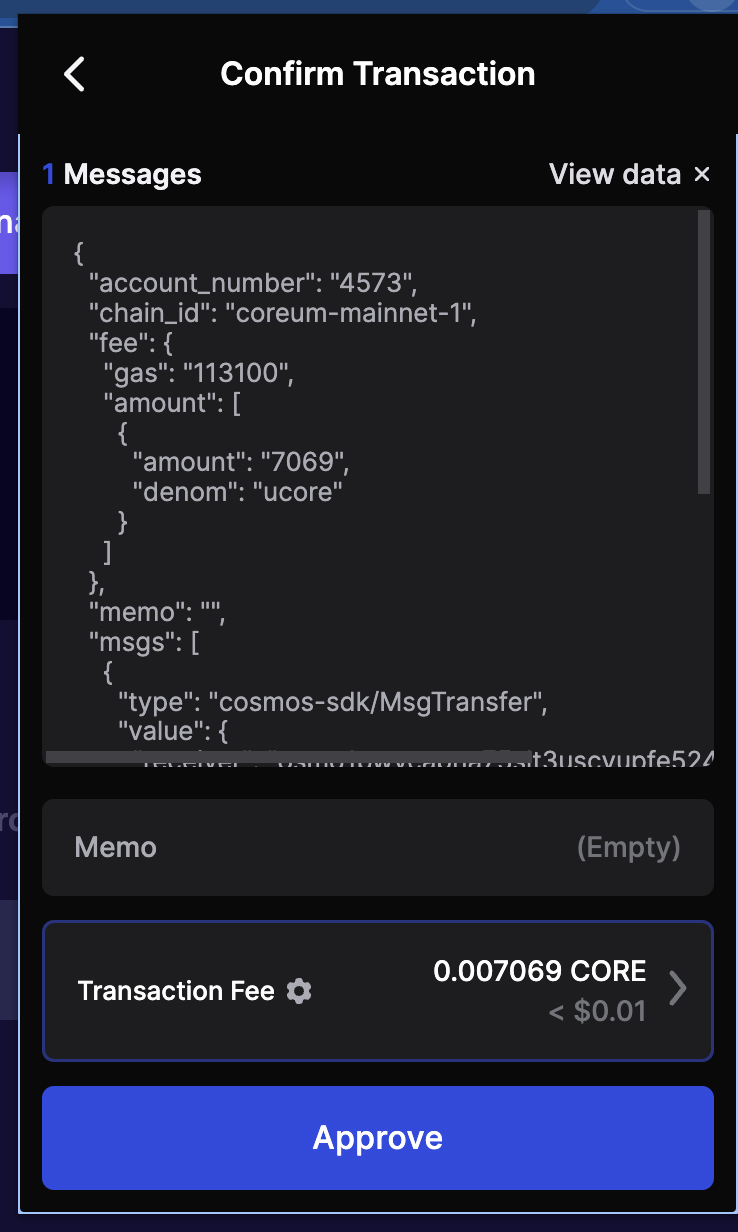
Ensure all transaction data is correct. This includes the amount, destination address, and asset type.
10. Final Transaction Confirmation
Before the transaction is broadcasted, confirm it for the last time. This is the final step before the transaction is sent to the network.
11. Transaction Explorer

Once the transaction is confirmed, you can view it on Coreum's blockchain explorer.
Note: Tt's essential to understand that IBC transactions might not be instantaneous. There's a
brief delay between sending the transaction from the source chain and receiving it on the
destination chain. Additionally, if a transaction timeouts for any reason, this will be visible on
the source chain, not the destination chain. Always monitor the source chain's explorer for any
timeout or error messages related to your IBC transaction.
12. Transaction Hash
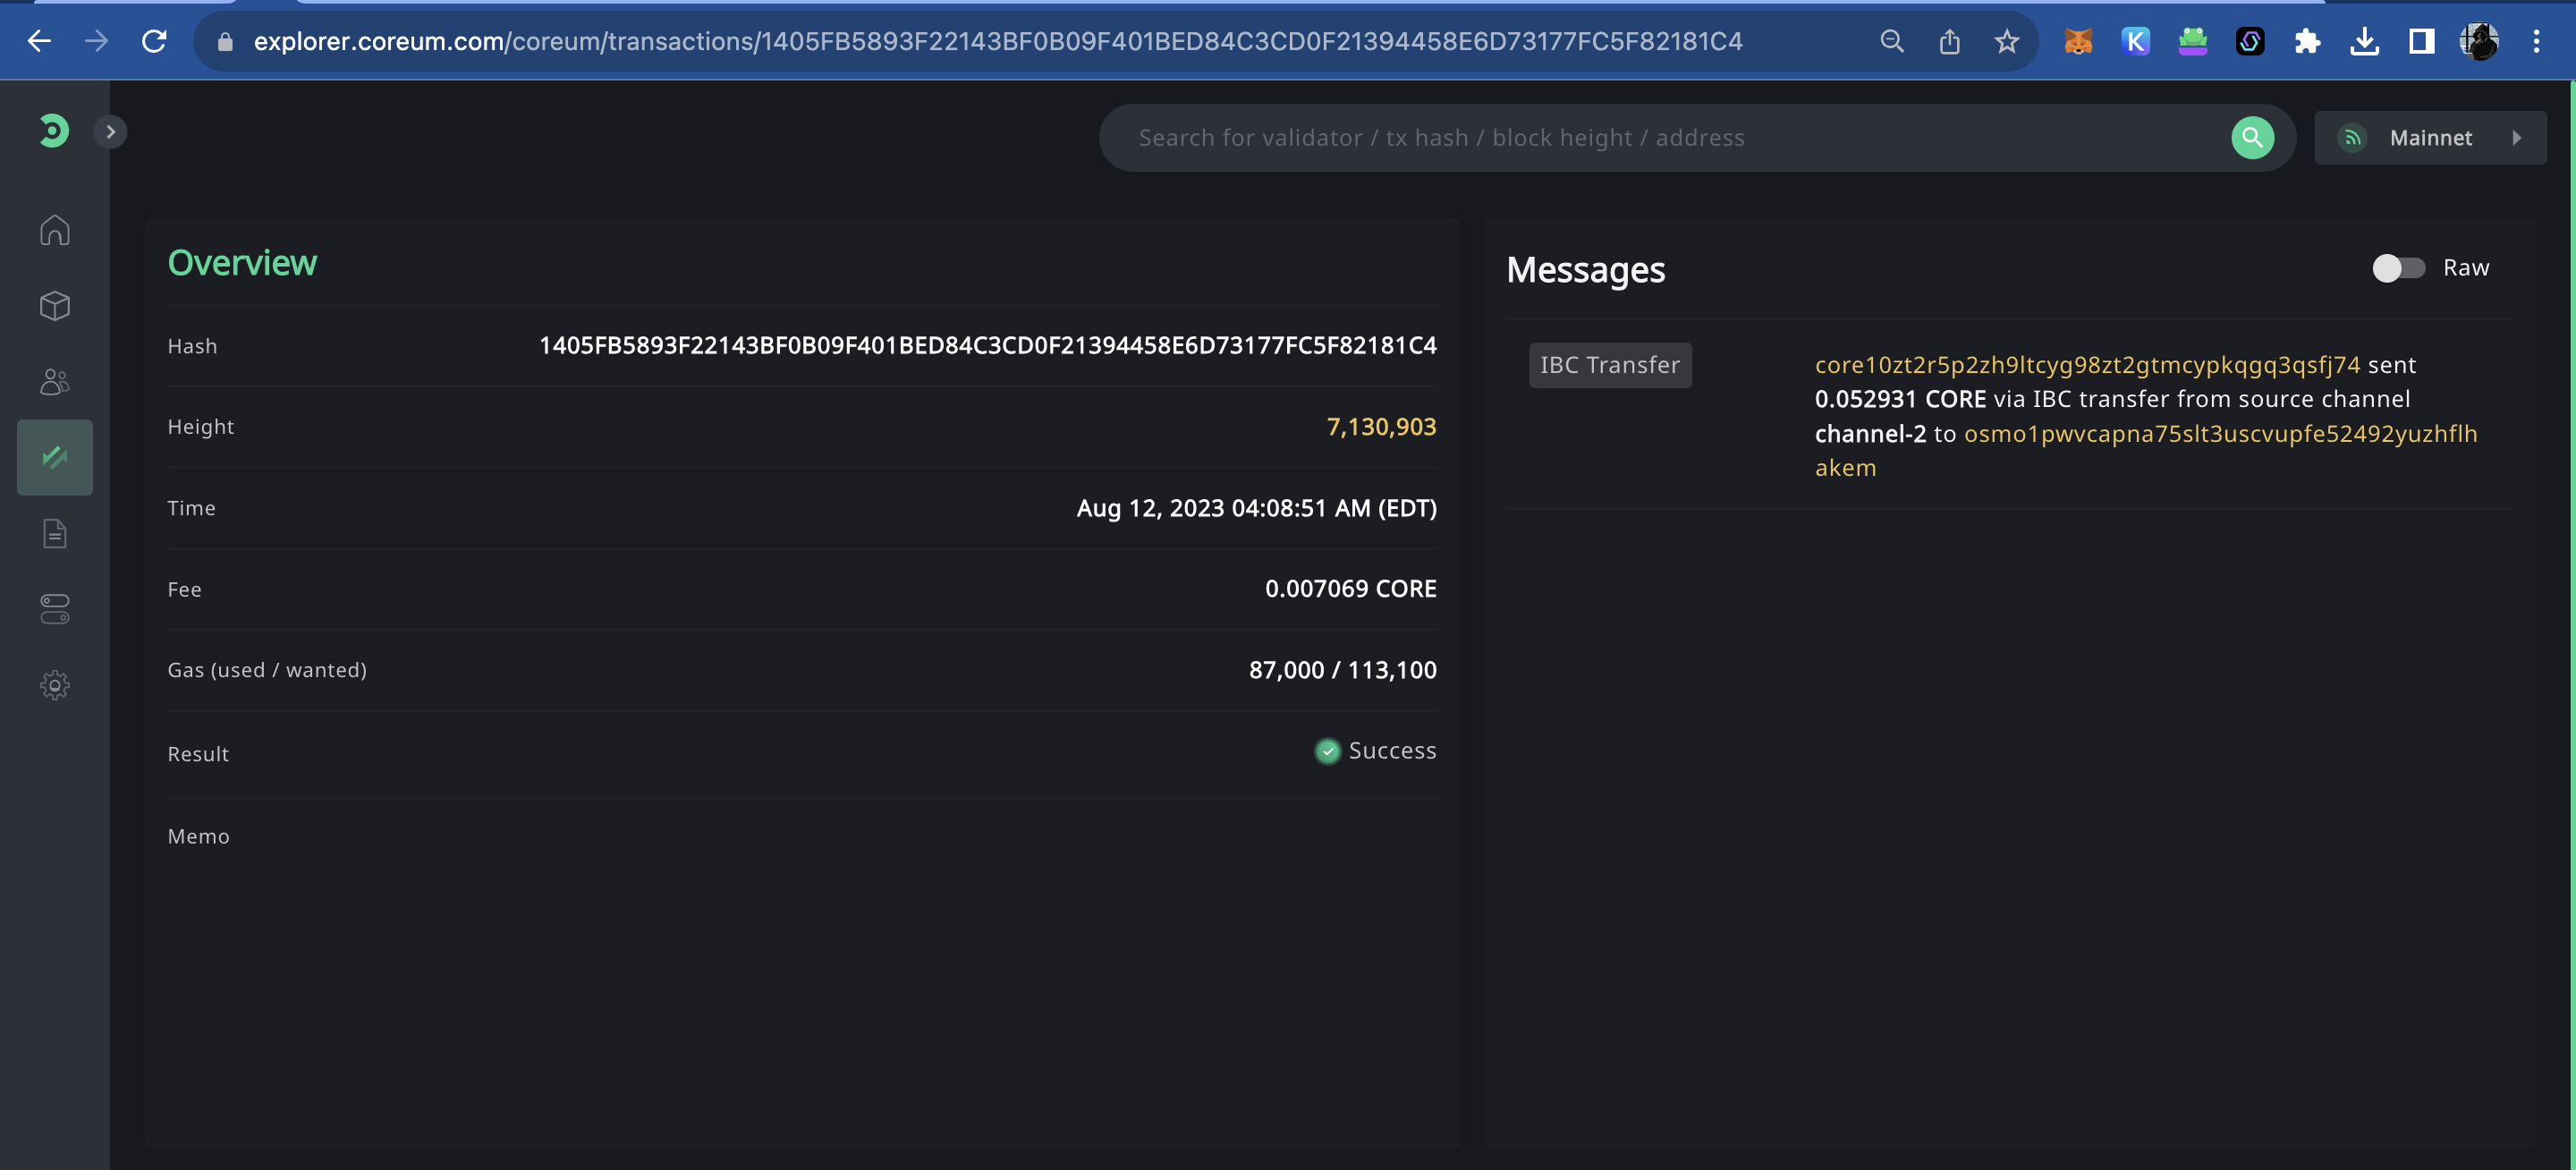
This is the unique identifier for your transaction. You can use it to track the status of your transfer.
13. Explorer Transaction Messages

In the blockchain explorer, you can see detailed messages associated with your transaction, including confirmations from validators and more.
Transfer Message
{
    "memo": "",
    "@type": "/ibc.applications.transfer.v1.MsgTransfer",
    "token": {
        "denom": "ucore",
        "amount": "52931"
    },
    "sender": "core10zt2r5p2zh9ltcyg98zt2gtmcypkqgq3qsfj74",
    "receiver": "osmo1pwvcapna75slt3uscvupfe52492yuzhflhakem",
    "source_port": "transfer",
    "source_channel": "channel-2",
    "timeout_height": {
        "revision_height": "10958485",
        "revision_number": "1"
    },
    "timeout_timestamp": "0"
}
Transfer Logs
Here are the example logs from our IBC Transfer:
Logs
[
    {
        "events": [
            {
                "type": "coin_received",
                "attributes": [
                    {
                        "key": "receiver",
                        "value": "core12k2pyuylm9t7ugdvz67h9pg4gmmvhn5vvgafk0"
                    },
                    {
                        "key": "amount",
                        "value": "52931ucore"
                    }
                ]
            },
            {
                "type": "coin_spent",
                "attributes": [
                    {
                        "key": "spender",
                        "value": "core10zt2r5p2zh9ltcyg98zt2gtmcypkqgq3qsfj74"
                    },
                    {
                        "key": "amount",
                        "value": "52931ucore"
                    }
                ]
            },
            {
                "type": "ibc_transfer",
                "attributes": [
                    {
                        "key": "sender",
                        "value": "core10zt2r5p2zh9ltcyg98zt2gtmcypkqgq3qsfj74"
                    },
                    {
                        "key": "receiver",
                        "value": "osmo1pwvcapna75slt3uscvupfe52492yuzhflhakem"
                    }
                ]
            },
            {
                "type": "message",
                "attributes": [
                    {
                        "key": "action",
                        "value": "/ibc.applications.transfer.v1.MsgTransfer"
                    },
                    {
                        "key": "sender",
                        "value": "core10zt2r5p2zh9ltcyg98zt2gtmcypkqgq3qsfj74"
                    },
                    {
                        "key": "module",
                        "value": "ibc_channel"
                    },
                    {
                        "key": "module",
                        "value": "transfer"
                    }
                ]
            },
            {
                "type": "send_packet",
                "attributes": [
                    {
                        "key": "packet_data",
                        "value": "{\"amount\":\"52931\",\"denom\":\"ucore\",\"receiver\":\"osmo1pwvcapna75slt3uscvupfe52492yuzhflhakem\",\"sender\":\"core10zt2r5p2zh9ltcyg98zt2gtmcypkqgq3qsfj74\"}"
                    },
                    {
                        "key": "packet_data_hex",
                        "value": "7b22616d6f756e74223a223532393331222c2264656e6f6d223a2275636f7265222c227265636569766572223a226f736d6f317077766361706e613735736c74337573637675706665353234393279757a68666c68616b656d222c2273656e646572223a22636f726531307a7432723570327a68396c7463796739387a743267746d6379706b716771337173666a3734227d"
                    },
                    {
                        "key": "packet_timeout_height",
                        "value": "1-10958485"
                    },
                    {
                        "key": "packet_timeout_timestamp",
                        "value": "0"
                    },
                    {
                        "key": "packet_sequence",
                        "value": "17"
                    },
                    {
                        "key": "packet_src_port",
                        "value": "transfer"
                    },
                    {
                        "key": "packet_src_channel",
                        "value": "channel-2"
                    },
                    {
                        "key": "packet_dst_port",
                        "value": "transfer"
                    },
                    {
                        "key": "packet_dst_channel",
                        "value": "channel-2188"
                    },
                    {
                        "key": "packet_channel_ordering",
                        "value": "ORDER_UNORDERED"
                    },
                    {
                        "key": "packet_connection",
                        "value": "connection-3"
                    }
                ]
            },
            {
                "type": "transfer",
                "attributes": [
                    {
                        "key": "recipient",
                        "value": "core12k2pyuylm9t7ugdvz67h9pg4gmmvhn5vvgafk0"
                    },
                    {
                        "key": "sender",
                        "value": "core10zt2r5p2zh9ltcyg98zt2gtmcypkqgq3qsfj74"
                    },
                    {
                        "key": "amount",
                        "value": "52931ucore"
                    }
                ]
            }
        ]
    }
]
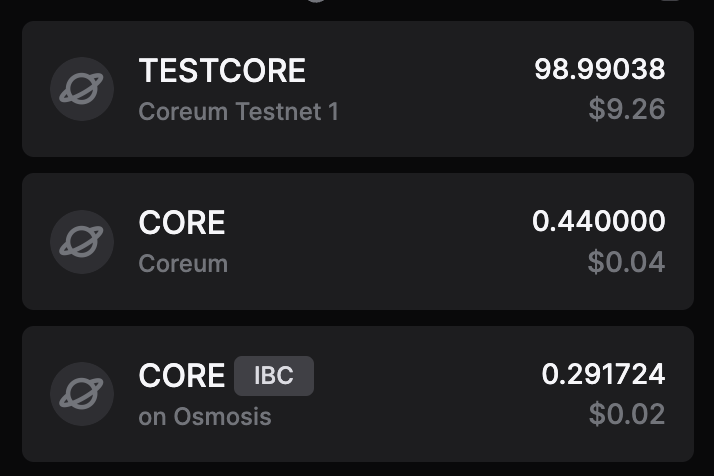
14. Verify Successful Transfer to Osmosis
Now we can see our tokens have arrived, and are named "CORE on Osmosis", and have an IBC label.
By following these steps, you should successfully send an IBC transfer to osmosis using the Keplr wallet on Coreum. Remember to always double-check details before confirming transactions to ensure the security and accuracy of your transfers.